

In the world of embroidery, getting the perfect design can often seem like a daunting task. That’s where **Custom Embroidery Digitizing Services** come in, providing the technology and expertise to transform your ideas into beautiful embroidered pieces. Whether you're a small business looking to create branded merchandise or an individual looking to personalize a gift, understanding how to use these services effectively can make a big difference. This guide will walk you through the key steps to ensure your design turns out just the way you envisioned it.
Understanding digitalization of embroidery settings
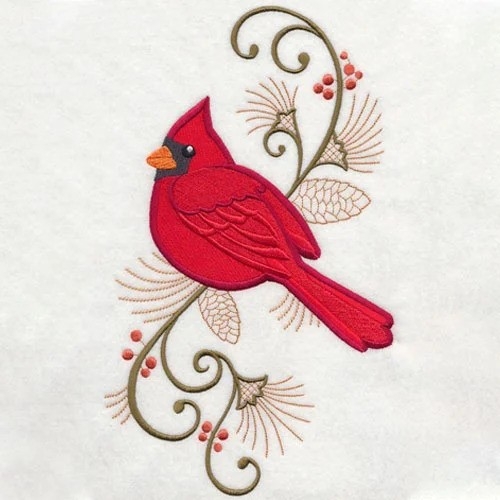
The user digital embroidery is a process that converts images or designs into digital files that can be interpreted by embroidery machines. This conversion includes the design of stitches, lengths, and colors of stitches where the machine continues. Digitized files include instructions on point density, points (satin, stuffing, etc.), and sequences that need to be applied to points. The accuracy of this digitalization process is important. This is to affect the clarity, sustainability, and visual charm of the final embroidery parts.
Choosing the Right Embroidery Digitizing Service Provider
When choosing an embroidery digitizing service provider, consider their experience and qualifications. Browse their portfolio to see examples of their work in a variety of styles and levels of complexity. Reviews and customer reviews can understand the quality and reliability of the service. You need clear and quick communication so that your vision is properly understood and executed. Lastly, compare prices from different suppliers to ensure you get a fair price without compromising on quality. Make sure to ask for quotes so that you can make an informed decision.
Preparing Your Design for Digitizing
Before sending your design to the digitizer, it's important to prepare it appropriately. Here’s how to do that:
- **Choose the Right Format**: Ensure your design is in a high-quality format such as PNG, JPG, or vector files (AI, SVG) for best results.
- **Simplify the Design**: Complex designs may not translate well to embroidery. Consider simplifying intricate details while maintaining the core elements that represent your idea.
- **Color Selection**: Clearly indicate the colors you want to use. Provide Pantone or HEX color codes to ensure accurate color matching in the embroidery.
- **Provide Size Specifications**: Specify the dimensions you want for the finished embroidery. Different sizes can require different digitizing techniques.
- **Include Notes**: If there are specific elements you want emphasized or particular stitching methods you prefer, include these notes when you submit your design.
The Digitizing Process Explained Step-by-Step
Once you've submitted your design, the digitizing process typically follows these steps:
- **Initial Review**: The digitizer will review your design and requirements, assessing the best approach for conversion.
- **Digitization**: Specialized software is used to create a stitch file, selecting appropriate stitch types and determining the sequence of stitching.
- **Simulation**: A simulation is generated to visualize the design as it would appear when stitched, allowing for the identification of potential issues.
- **Adjustments**: Feedback is incorporated to make any necessary adjustments, optimizing the design for embroidery.
- **Finalization**: Upon approval, the stitch file is finalized and ready for use with embroidery machines.
Reviewing and Approving the Digitized Design
After the digitization is complete, you'll receive a preview of the final design. Carefully examine the preview to ensure it aligns with your vision and provided specifications. Check for accuracy in design elements and ensure the stitch placement and types are appropriate for your intended fabric. Verify that the colors in the digitized file match your selected palette, considering Pantone or HEX codes if provided. Pay attention to the overall aesthetics and look for any areas that may need refinement or adjustments. If you spot any issues or deviations, provide clear feedback for revisions to optimize the design before moving to production.
Using the Digitized File for Embroidery
Once your digitized file is approved, use it for embroidery. Follow these steps:
• **File Transfer**: Upload the scanned file to your embroidery machine, usually via a USB drive or direct connection. • **Prepare the Fabric**: Make sure your fabric is clean and securely hooped to prevent any movement during the embroidery process.
• **Select the Right Thread**: Choose threads that match your design specifications to achieve the desired look and quality. • **Test Stitch**: For especially intricate designs, sew a test stitch onto your fabric. This helps identify any issues that may need adjusting before you begin the final sewing. • **Set Up Your Machine**: Make sure your embroidery machine is set up correctly with the correct needle, tension and stabilizer for the type of fabric. • **Start Embroidery**: Start the embroidery process and closely monitor that your machine is running smoothly and your design is stitched as planned. • ** Inspection of the final product **: When the embroidery is completed, the completed part is examined to guarantee that the design will respond to expectations. Check the presence of a break or displacement that may require a color. By carefully performing these steps, you can effectively rehabilitate the selected fabric scanned design and reach polite and specialized results.
Conclusion
Investment in user services for Custom embroidery digitizing services is a strategic step to improve the quality and accuracy of embroidery projects. By carefully selecting a famous service provider and preparing for the design, you can confirm that the final product is satisfying your highest expectations. The digitalization process includes detailed steps to convert designs in a format that can make your design work completely. Reviewing and approving scanned files prior to operation is essential to identify potential issues early. Once you have the digitized files, following best practices for fabric preparation, yarn selection and machine setup will contribute to the ongoing success of your project. With meticulous attention to detail and effective communication with your digitizer, you can transform your creative ideas into stunning embroidered pieces that stand out. Happy embroidering!