

Sometimes, integrating portals can be difficult. We saw a lot of feedback and questions from customers about the process, so we created a step by step guide on How to Install the Default Portal Add-On for Dynamics 365. But in case you’ve decided to opt for a third party portal like our Dynamics 365 WordPress Portal, then this blog is for you.
We are going to discuss how to install and enable Dynamics 365 WordPress portal in your CRM.
A quick overview of the Dynamics 365 WordPress portal:
It is a third party portal solution for your business. It helps you provide quality service to your customers round the clock. It makes your team’s work effortless.
Let’s see steps to install it.
Installation:
To install the ‘Dynamics CRM Customer Portal’ plugin, the following steps have to be followed:
Step 1: Once you have purchased the plugin, you will get a zip file named DynamicsCRM-Customer-Portal-v3.0.zip.
Step 2: Log in to your CRM Account and click on Settings → Solutions
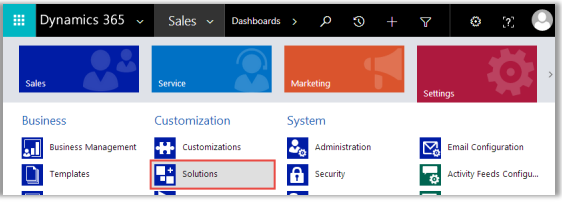
Step 2(a): If you are using a unified interface, click on the Settings icon which is on the right side of the Title bar. Then click on Advanced Settings.
Original Source: https://www.crmjetty.com/blog/how-to-get-started-with-dynamics-365-portal/