

5 Steps to a Successful Concrete Installation: How To Install Stamped Concrete
Concrete installation can be a tricky process. It's important to know the right steps for installing stamped concrete because it will make your job easier and give you the best results. In this blog post, you'll find five steps that will help guide you through the process of installing stamped concrete. The first thing to consider is the style of stamp that you would like installed in your yard. There are many different styles and colors available, so it may be difficult to choose which one you want for your home.
Step One: Preparing for Installation
The first step to a successful concrete installation is preparation. The type of surface you're working on will determine the necessary steps and materials needed, but there are some general guidelines that apply to almost all installations. Before starting your project, it's important that you remove any debris or vegetation from the area where your stamped concrete patio or walkway will be installed as well as an additional two feet beyond each side of your intended work site.
Some people prefer to grade their soil before installing stamped concrete by removing dirt and adding new topsoil so they have a perfectly level base in which to place their decorative flooring material. While this isn't absolutely essential when preparing a stamping job, grading can be very helpful and may save you a lot of time.

Step Two: Setting Forms for Your Stamped Concrete Patio or Walkway
After the area has been prepared, it's important to set forms around your work site in order to contain the concrete as it is poured. The depth of your form will be determined by how deep you need your stamped patio or walkway to be; generally speaking, most people should use two inches worth of material inside each side of their forms.
Be sure that all corners are square and level before inserting any screws so they don't interfere with containing your materials later on during installation. Some contractors prefer using stakes instead depending on what type of surface they're working with (wood vs concrete). If you're using stakes, be sure to insert them into the ground before placing your forms.
Step Three: Mixing and Pouring Your Concrete Patio or Walkway
After you've set up all of your forms around your work site (and removed any unnecessary screws that might interfere with containing concrete), it's time to start mixing! The ratio for this kind of installation is typically five gallons of water for every 80-pound bag of cement mix.
If you need more than one bag per batch, just keep the same proportions in mind; there should always be five gallons of water mixed with an 80-pound sack of material each time a new batch is poured. Once everything has been properly measured out and combined together, simply pour the mixture into your forms. After you've added the first layer of concrete, it's time to wait; allow this initial stage to dry for a minimum of 12 hours before continuing with step four.
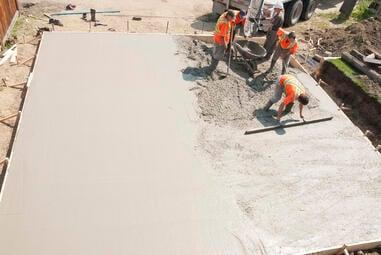
Step Four: Screeding and Troweling Your Concrete Patio or Walkway
After allowing enough time for the previous batch (or batches) of material in your project area to properly set, you can begin screeding off excess water and achieving an even surface by using either a bull float trowel or magnesium screed board tool. Once everything has been leveled out perfectly, use a broom to brush away any remaining materials from around your worksite; continue until there are no visible traces left behind that might cause uneven surfaces later on.
Step Five: Applying Your Stamped Concrete Patio or Walkway Texture and Coloring Techniques
Once your stamped concrete patio or walkway has been allowed to dry completely, it's time for the final step! Apply any desired color stains using a paint roller before you apply your texture material (typically this is what most people use as their base coat). Scrape away excess materials with a trowel; allow everything to set overnight once again before applying additional coats of stain if necessary. When finished, seal your decorative flooring with an appropriate sealant in order to protect it from water damage over time. Congratulations - you've completed the job! Now all that remains is enjoying the fruits of your labor so you can invite friends and family over for a relaxing time in the comfort of your new stamped concrete patio or walkway.
If you're interested in learning more about how to install stamped concrete, concrete contractors Raleigh NC will be happy to assist you! We hope you've enjoyed learning about how to install stamped concrete! If you have any questions, feel free to contact us directly via this blog's comment section or by reaching out through our official website at raleigh concrete solutions.
If you want to make sure your project goes smoothly without any hiccups along the way, be sure not to overlook these kinds of options so all of your bases are covered from start-to-finish.Thanks for reading!